 Level
of Detail
 Level
of Detail
  LOD LOD
Level of detail, LOD, techniques can be a useful tool to maximize scene efficiency and provide maximum throughput of geometry, while also providing other benefits. The idea behind LOD is to provide multiple versions of a model to the renderer. Now, it can decide to use one or more of the models based on quality and efficiency considerations. This can reduce the memory footprint and time required to render the object. Level of detail is especially relevant for very large, complicated, models and in situations where many characters or objects are running around. In a shot of a crowd, characters up close to the camera will have sufficient intricacies, while on a distant ridge a much simpler model can be substituted for the character.
With MTOR you can attach level of detail attributes to groups of objects. Here's the basic workflow:
|
|
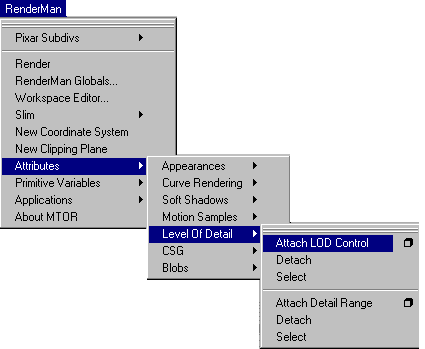
You'll want to group the different variations of a model together (simple, medium, and complex versions). To this grouped node, parent to the model versions, you'll want to attach a "LOD Control" Attributes> Level of Detail> Attach LOD Control |
||||||||||||||||||||
|
LOD Detail Range
Menu The "Detail Range" attribute must
be attached to each version of your LOD model. Each version of a model
must have an Archiver attached to it. Attributes> Level of Detail> Attach LOD Control The detail range is entered in pixel area. A 10x10 pixel limit would be entered as "100," for instance. For more explanation of what these boxes mean, read on . . .
|
||||||||||||||||||||
|
Detail Range
The detail range not only allows the specification of the visible range of a particular model version, it also lets you specify how different complexities of models will blend together. The "start" value defines at what resolution (in pixel area) that the image will come into view, appearing first as nearly transparent. The opacity increases as the resolution approaches the "low" value, at which point the object becomes completely opaque. Up to the "high" value, the object is opaque. During the range specified by "high" to "end," the model version will fade out, linearly.
|
||||||||||||||||||||
|
Attach Archivers
Remember that Archivers must be attached to each of the different resolution models. |
||||||||||||||||||||
|
Pixar Animation Studios
|