|
|||||||||||||||||||||||||||||||||||||||||||
 Crash Course to the
|
|||
|
1- Start Maya |
|||
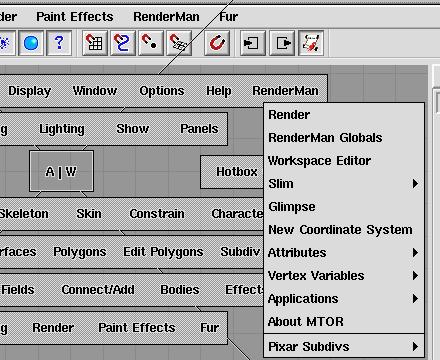
The MTOR menus appear in the Main Menu Bar & the Hotbox. |
2- Load MTOR Note: If it is not there, see if the plug-in has loaded . . . Window-> General Editors-> Plug-in Manager Load "mtor.so" & "mtorsubdiv.so" from the plug-in list. If the plug-ins
do not appear in the list browse for them under the /usr/local/rat/bin/
directory.
|
||
|
|
3- Set Project Location Having the correct project location is the first thing that should
be checked when creating a scene in Maya. To do this, (from Maya):
File-> Projects-> Set
Changing the projection location will take effect in the next Maya file to be opened, or when a new scene is started. When the project needs to be changed for a scene, always set the project correctly before opening the scene associated with it. MTOR will use this project location to place renderings and search for
shaders and other file data. Setting the correct project location will
greatly aid file management.
|
||
 |
4- Render an Image
The image should render into a new window. (Note: MTOR, by default, will render the view from the active window. Make sure the window to be rendered is the window that is active.) We'll now take a closer look at what's going on during rendering.
|
||
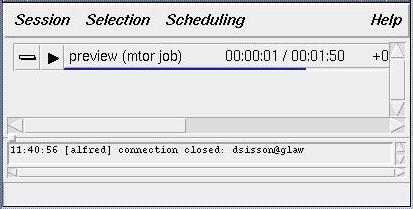 |
5- Submitting a Render Job to Alfred MTOR first converts the scene into a file format that the RenderMan renderer understands, a RIB file (short for RenderMan Interface Bytestream). After MTOR creates the RIB file, it hands the file to Alfred, to distribute the rendering job over a network. When Alfred gets the job, the Alfred window pops up (see left). This
Alfred window is a big queue, which can handle lots of rendering jobs.
From here, jobs can be paused, prioritized, and deleted. The blue line
shows the progress of an active job.
|
||
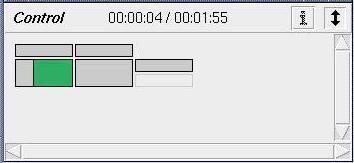 |
6- Keeping Tabs on Your Renders From the job window, we can find out even more information regarding the status of individual jobs. Here, each block represents a different part of a job, and the green block denotes what's currently active. More information about what's happening with a particular node can be found by left clicking on the blocks. Render again from the RenderMan menu, and watch the job complete
in the job window.
|
||
 |
7- The Image is Displayed in "it" A window pops up, with a rendering of our scene. The image has been rendered to "it". (Alternatively, images can also be rendered to file. We will do this later.) Right click in this window. "it"gives us a number of options.
The image can be saved, re-rendered, or zoomed into, among other things.
|
||
 |
8- "it" Supports Multiple Images Now right click on the image window and bring up the main it window.
The main "it" window will appear. In "it" we have a notion of "catalogs". Catalogs allow a collection of images to be added to them. The image we just rendered is the first image of this catalog, "Catalog". More images can be added, and scrolled through within the image window. Even more catalogs can be added. Notice if you render again more images will appear in the catalog.
|
||
|
|
9- Using Shaders So we've rendered a simple image. MTOR has used default shaders to describe the geometry. That is only so useful. We have much more control over the appearance of the image by attaching RenderMan shaders to the objects in the scene. One of the great strengths of RenderMan is its powerful procedural shading language. We'll need to add some shaders to the scene before we attach them to
the objects. This is where we'll use another member of the RenderMan Artist
Tools, Slim. With Slim, we'll use a palette to organize and attach shaders.
|
||
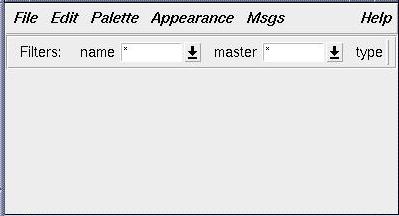 |
10- Creating a New Palette First create a palette with Slim. To this palette we'll add shaders, which we'll attach to the objects in the scene.
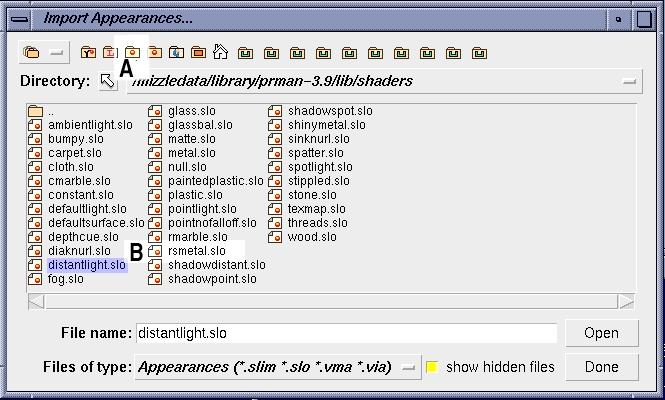
The palette appears. Now import a shader into the palette. So from the palette menu: The "Import Appearances..." window will open. |
||
|
|||
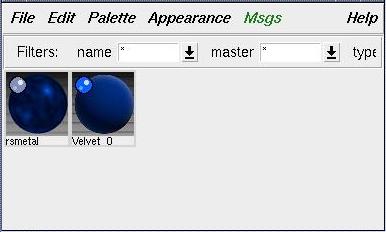 |
12- Creating Shaders The palette now contains "Rsmetal".
To demonstrate this, we'll create a velvet shader.
File-> Create Appearance-> Surface-> Velvet
|
||
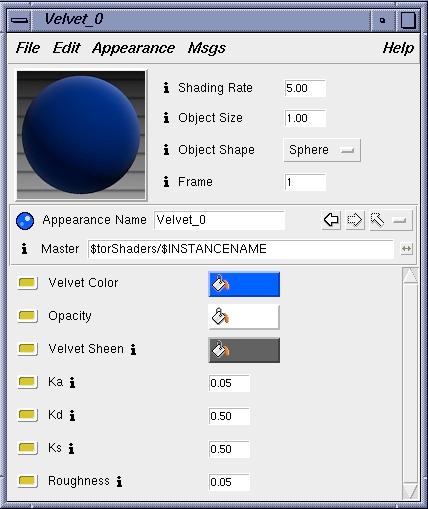 |
13- The Appearance Editor This is the appearance editor for our velvet. These parameters can all
be changed, but we'll just change the color . . . yellow is fine. Close
this window.
|
||
|
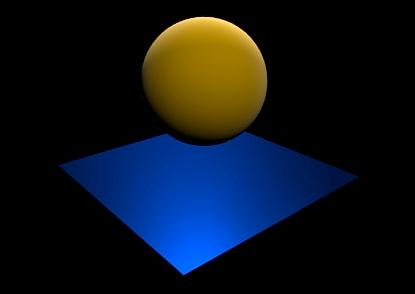
14- Attaching Shaders The shaders must now be attached in this scene. To accomplish this, first select the plane. Second, select the shader, rsmetal. Now attach the two. To attach the shaders, from the palette,
(or right click on the shader, rsmetal, and select "Attach"). To double check that the shader is attached, deselect all objects. Pick rsmetal, and see what objects it's attached to. Now, using the same methods, attach the velvet shader to the sphere. |
||
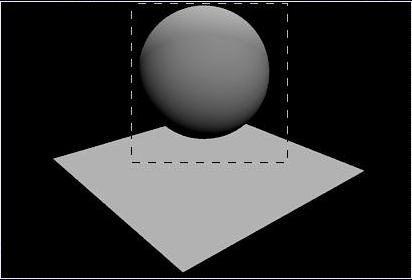 |
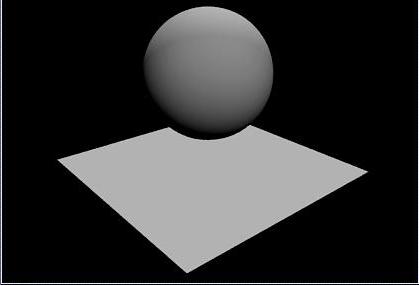
15- Rendering Selected Area with "it" Next we'll re-render the scene, but we'll just re-render part of it, to demonstrate another feature of it. Often it's only necessary to render part of a scene . . . when adjusting shaders, for instance. For this scene, we'll just render the ball. First, click and drag a box around the sphere, in the image window,
as seen here on the left. Now render. Make sure the correct window is active.
|
||

Drag and square, then render that area. |
16- Deselect the Render Area Only the area defined by the box is rendered onto the old image. To get rid of the box, click once in the image window. |
||
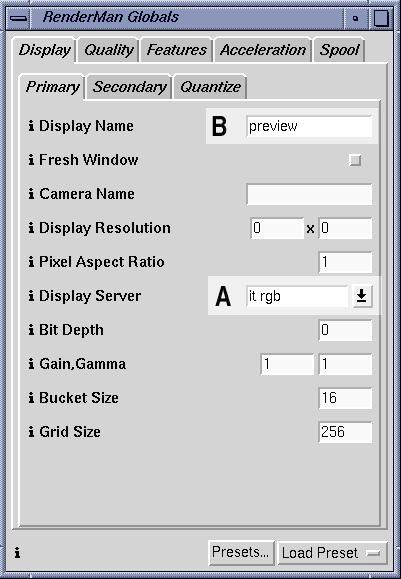
The RenderMan Globals Window |
17- Rendering an Image to File So we've rendered to "it", but you'll want to render directly to file. To render directly to a file, open up the render globals.
RenderMan-> Render Globals
Bring up the tab that is displayed in the image on the left. First, we'll set the image to render directly to a file. The parameter,
"display server" (denoted by the large "A") determines the file format
of the rendering. Select the arrow and pick a different file format, "tiff
rgba". Now Alfred will render to a tiff file, with an alpha channel.
Second, notice "B". Here you can enter a filename for the rendering. Third, note "Display Resolution". If the display resolution is set to
zeros, the resolution of the active Maya window will be used. If a specific
resolution is desired, enter that instead.
|
||
|
The Alfred Job Window. View completed renderings from here. |
18- Viewing a Rendered Tif Now render again. Open the job window, as was described above. Watch the job render. When the green box goes gray, the image is done. The image is placed in your rmanpix directory under the project location.
The image can be opened from the command line, via "sho". To use "sho" get in the directory with the image: sho filename.tif More conveniently, the image can be viewed directly from the Alfred
job window. When the rendering job is done, click on the "image box", which
should be the box with the thick black line, the last box completed.
Left Click-> Frame.0001_Done_(chaser)->
|
||
 |
Well done.
Take some time experimenting with the RAT, search for more info on specific questions in the documentation, take the Slim Crash Course, or start the tutorials: try the general introduction or try the individual courses. For more information refer to : |
||
|
Pixar Animation Studios
|